Sunday, September 7, 2014

Log Cabin Show 'N' Tell


Wow, summer is now officially behind us and the upcoming holidays are quickly approaching.  Hard to believe!  This summer I've tried to spend every spare minute when I am not working or wrapped up in day to day living quilting my unquilted tops.  Although it's been such a relief to finally complete several quilts all the way down to the binding, sleeve, and label, I think I grew a bit tired of it after awhile.  I was so anxious to get back to what I truly love the most, piecing!  So the last four weeks I've been doing just that. . .  
In early August I took a break from machine quilting and decided it was time to piece a new top. . . .hooray!  And what could be more fun than a traditional log cabin to use up MORE of my scrappy strip stash.  I've gone a bit overboard over the last couple of years with these strips, I admit.  But it is such a convenience to just open up a plastic bin and start sewing with strips I've had cut and continue to cut in between projects.
I decided to make this log cabin for my husband, partly to celebrate a milestone birthday he is having this December.  But it really came about after he made a comment to me that I've made everyone a quilt except for him!  And he was right, I have never made him his very own quilt!  Although it really never dawned on me that he didn't consider all the quilts I've made to date for our home his quilts, too.  But let's face it, most men don't go for quilts in pastels and Easter egg colors!
So I asked him what quilt pattern he would like and his choice was the log cabin pattern.  And it turned out to be the perfect choice.  I went through two closets of fabric and cut strips from any fabric that remotely looked like a man's shirt, underwear, or pajamas, anything fishing or surfing related (his two favorite passions), any fabrics with dogs and even some tropical  prints thrown in for fun and added those to my ever growing bin of scrappy strips.  I even cut up a few of his own shirts and funny print boxer shorts that he no longer wore!  That was a ton of fun and it really gives him something to talk about now.

I separated the strips by value first, lights and darks, and then by colors.  The blocks are foundation-pieced and finish at 7 1/2" with the strips finishing at 3/4" wide.  The top measures 75" square.  I am currently marking the top in a simple grid for quilting and will hopefully get the quilting completed in the next couple of weeks. 

Another bit of recent excitement is the recent release of the book 500 Traditional Quilts by Lark Crafts.  I am so honored to have two of my quilt featured in this inspirational book of amazing quilts.
Summer at the Lake. . .
. . .and Blooming in Chintz are featured.  Both of these quilts will also be part of the 500 Traditional Quilts traveling exhibit beginning this fall in Houston at International Quilt Festival.  The exhibit will travel through next summer 2015 as part of the many shows Quilt Festival hosts.  If you have the opportunity to visit one of the shows, I'm sure it will be very exciting to see many of the quilts featured in this book in person.

Happy Quilting!

Thursday, July 10, 2014

Orange Peel Quilting

Hopefully by now some of you have tried quilting cables with your walking foot!  Here is another easy and simple way to quilt with a walking foot and the effect is similar to the look of hand quilting on those old antique quilts we covet.  This quilting design is known as orange peel or pumpkin seed quilting.  I love this look, especially for scrappy quilts, and it's very easy to do.

Above is a little scrappy rail fence I finished last month, I've named it Petit Jardin which means Little Garden in French.  The finished size is approximately 24 inches by 36 inches and it's just a fun, colorful little quilt to display in my home.  You can see I've marked all of my lines and a feather design that wraps around the four sides.  When I mark the orange peel design, I use a circle template and place it so that the curve of the circle intersects each corner of the block.  I line up the circle with two corners, or one side, at a time, marking every curve individually on each side of the block. Click HERE to see how I use a template to mark the orange peel design.
I approach the quilting the same way I approach quilting cables, sewing one line at a time from left to right.  I always begin in the top center of the quilt and work my way over to the right hand edge, sewing one line, from the top to bottom, then moving over to the next line beginning at the top again.  When I reach the right hand edge of the quilt, I then turn the quilt 180 degrees and work from the center out to the right edge again.
Here I've flipped the quilt over so you can see the backside and the quilting a little easier.  As you can see, I'm sewing all the lines going in the same direction first, always working from the top to bottom and left to right.
Once I've completed all the lines going in one direction, I turn the quilt 90 degrees and beginning at the top of the center, I start sewing the lines going in the opposite direction.  I am starting a line of quilting at the seam line of the border, see above.  I always bring the bobbin thread to the top of the quilt before I begin sewing.
I follow each line, one at a time, taking my time and sewing along each gentle curve.  For tips on how I handle the bulk of the quilt when sewing curved lines, please see my post on quilting cables. 
Here are a few shots of the orange peel quilting completed.

And below, here is a shot of the back side of the quilt.
And finally, my finished Petit Jardin!  I was even pleased with the way the feather turned out in the border.  The pictures below are of the quilt after it has been washed, so you will notice a bit more puckering around the quilting.


Thanks to all of you again for your enthusiasm about quilting cables with a walking foot that I posted back in April.  I love the comments and welcome your questions.  I do hope it has inspired you to try quilting cables and now, orange peels!  Don't hesitate to contact me.  Happy Quilting!

Thursday, July 3, 2014

Saturday, June 21, 2014

Fish Scraps

I happened to be in our local Joann's this morning and was browsing the latest issues of quilt magazines.  I was quite surprised and delighted to see my quilt, Fish Scraps, featured in Quilter's Newsletter's newest issue of Best Scrap Quilts.


This quilt was made back in 2006 and was featured in a QNM issue around that time after having been a selected finalist in the Do You EQ? contest.  It has also recently been on tour in the International Quilt Festival's exhibit "In the American Tradition" since last October, traveling to all of their shows this year.
I had originally been given a couple of large boxes of fabric samples from a salesman that worked for our screenprinting company at the time.  He had formally been a sales rep for a surf wear clothing company and was getting rid of leftover fabrics.  Of course, I couldn't let him throw any of it away!  After considerable thought, I decided to do a quilt that tied the myriad of tropical prints together.  I had seen a vintage fish quilt years before and that inspired this quilt.
I designed 10 variations of the fish in EQ (Electric Quilt software).  All of them are foundation-pieced on paper, much easier than dealing with templates for me.  Each fish is unique and some even have eyes created by careful positioning of the design in the fabric. 
With so many fabrics, I decided to create a scrappy pieced back to the quilt as well.  And as much as I hate to admit it, this quilt hardly made a dent in this fabric stash!
So be sure and pick up your latest issue of Best Scrap Quilts.  There are 28 scrappy quilts to inspire you!  Happy Quilting!

Sunday, June 15, 2014

Meet Karen Griska of Selvage Blog

Hi Everyone!  Meet Karen Griska of Litchfield, Connecticut, the amazing woman and quilter behind Selvage Blog.  I recently "met" Karen via Pinterest, as I was pinning some of her quilts on my Quilt Board and we got to chatting back and forth.  I am so honored that Karen featured my blog on her popular blog last week, she has a huge following, and it's no wonder, she creates some pretty amazing and very unique scrap quilts.  This is one of the MANY great scrap quilts of Karen's that caught my eye.
Karen has her quilt patterns for sale on her Etsy site.  She is also the author of "Quilts from the Selvage Edge" published by AQS.  Be sure to take a few minutes to check out her patterns, she is so talented at creating uniquely amazing quilts out of so many little pieces!  (Be still my heart!!)  I just love her style.  And she is quite an amazing blogger as well!  Thank you Karen!

Thursday, May 29, 2014

Irish Blue

I thought I would squeeze a quick post in before the month of May is over!  I've been sidetracked this month, working on some old needlework projects and framing some pieces that have been sitting around for years in the closet, so I only managed to get one quilt finished, but I thought I'd do a little show and tell anyway.
I finished quilting this quilt earlier this month and thought you all would like to see more cables done with a walking foot.  This is a triple Irish Chain quilt I did a few years back in blue and white as a class sample for a workshop I taught.  I waited to quilt it until recently, it's been one of several in a stack needing to be quilted.  This quilt was also a tester for a border cable I've been wanting to try as well as a feathered wreath in the alternating white blocks.
I know it may be somewhat difficult to see the quilting in some of these pics, once again, a photographer I am not!  But I did try shining a lamp off to the side so the quilting would show a little more.  There is also a small cable in the inner white border.  The straight lines and all the cable quilting were done with a walking foot.
Don't you love this cable?  I had seen a similar one on an antique quilt long ago and then came across a drawing of it in a very old quilt magazine.  I photocopied it, enlarging it many times, and then reworked it to figure out the repeats so that it would fit on my border.  The inner cable is from a stencil I have, perfect for a narrow space.
This was another experiment, trying free-motioned feather wreaths.  I will admit, I am not a big free-motion quilter, although I have done some.  I love the look, but don't really enjoy doing it, mainly because I wind up with such a sore neck and back, I feel like I've been in a car accident!  And I do try very hard not to tense up, but it still requires a great amount of physical and mental energy, no matter how much I try to relax.  But that being said, I am thrilled with the results.
Here you can see how the border wraps the corner of the quilt, a bit different than many that you see.  And if you look closely at the inner white border, I just ran it into the seamline and didn't bother wrapping the corner on that one.  So it works either way, it's really a matter of taste and how much extra work you want to put into it.

And a quick note here, this quilt is really VERY white, but once again, due to lighting and amateur photography, you are seeing a dirty beige!  I'm sorry, but I figured in this case, you really needed to see the quilting more than all that whiteness.

For those of you that are curious, the batting I used is Hobb's 80/20, whoops, my mistake, it is Mountain Mist 100% cotton.  Normally I use Hobb's 80/20, but I wanted to try this one out for a change.  And I loved it, it's very thin and drapes well, very similar to an antique quilt.  The top thread I quilt with is Wonderfil's Invisafil, my absolute favorite thread for quilting.  It is very fine, similar to silk at 100 wt., but is a very soft polyester and very strong.  It sinks into the fabric, so you see the indentation, not the thread, and it works extremely well for scrappy quilts when you have a wide array of colors and prints, blending in almost perfectly on most colors.  I have used it now exclusively for many years and absolutely love it.  And in the bobbin I used Wonderfil's Konfetti 50 wt. Egyptian cotton, a very nice, low-lint cotton thread.

And finally, I want to put out a HUGE thank you and GIANT group hug to all of you that have commented or e-mailed me on the tutorial I posted on quilting cables with a walking foot!!!  I am BLOWN AWAY at the response I received, I truly had no idea it would reach so many of you!  It makes me happier than words can say to hear from you.  And to know there are like-minded women out there that feel the same way I do about traditional style quilting is just so reassuring to know that I am not alone in how I feel!  Let me just say that when I started this blog, it was a bit nerve wracking writing to "air" and not thinking that anyone would read or care what I had to say.  So I just have to let you all know that bloggers DO want your comments, especially me!  And I hope that all of you that took the time to write received my replies because I did respond to everyone.  If you aren't getting a response from me, please let me know!  I am still trying to figure this all out and sometimes it's by the seat of my pants.

Hope you continue to be inspired!  Until next time. . . .Happy Quilting!!! 

Monday, April 21, 2014

Quilt Dots Blog Tour

CHECK OUT THE QUILT DOTS PATTERN PARADE BLOG TOUR!


FREE PRIZES BEING GIVEN AWAY EACH DAY!!

Hi everyone and welcome to my blog on the Quilt Dots Pattern Parade Blog Tour!  Quilt Dots is giving away a Rahna Summerlin Collection of Quilt Dots and 5 Bookmarks of Your Choice, value $75.  In addition,  I will be giving away two yards of beautiful Falling Rose fabric from the Sugar Hill line by Tanya Whelan of Free Spirit Fabrics.  If you follow the link to find out more about free prizes, it will tell you how you can win.  Also, if you would like to place an order for a set, go here to place your order. 

Thank you for stopping by and Good Luck!!

Sunday, April 20, 2014

Happy Easter & Blog Tour

Happy Easter!  Happy Spring!

May all of you have a wonderful holiday on this Easter Sunday!

Zappy Dots Blog Tour

Thank you, Kim, at Zappy Dots, for including my blog in their Blog Tour this week!!  My blog is scheduled for the tour for tomorrow, Monday the 21st.  Welcome to all of you that are stopping by to check out my quilts!  I appreciate you taking the time to linger and comment!

Here are is a link to see the other blogs on the tour:  http://zappydots.com/quiltdotsblog/category/pattern-parade-blog-tour.  There is one each day this week, so make sure you check it out and see what prizes are being given away!

Thursday, April 3, 2014

Quilting Cables

This is going to be a long one, sorry!  But in order to get the point across, this post required lots of pictures and I didn't have anyone nearby to video a tutorial, so sit back and enjoy, if possible!  If you've been following me on Instagram, you've seen some pictures of my postage stamp quilt with quilted cables in the borders.  This has raised several questions as to how I do this.  Most people thought this was done with free-motion quilting, but IT IS NOT!  This is all done with a walking foot, it's do-able for the beginner, you can do this on your home sewing machine with the proper accessories, and the results are worth the extra effort.
bloominginchintz.blogspot.com
I strive for a pretty traditional look in my quilts and in my quilting.  I really love the LOOK of hand-quilted quilts, particularly antique Amish quilts.  When I started quilting way back when, I tried hand-quilting ONCE, and that was enough!  But I didn't want to quilt my quilts just any ole way, I wanted them to have a "finished" look, almost like they are antiques themselves.  So I did a lot of straight line quilting, read several machine quilting books that were out at the time, and really studied antique quilts and how they were quilted.

Cables in borders appeared again and again.  After thinking about it, I thought it couldn't be that difficult to do with a walking foot, it's basically a continuous line with gentle curves.  And I still had not jumped into free-motion quilting at this point, I was never happy with my results and was too impatient to practice or sacrifice a quilt top.  But after my first quilt that I quilted cables in the border, I was hooked.  It looked almost hand-quilted and I loved the look.  And best of all, it was easy to do.

bloominginchintz.blogspot.com
So to make this easy to understand, I tried to photograph the process I go through while I quilted Forty-Nine Cents.  I do mark all of my lines I intend to quilt with a water soluble blue marker.  I've been using these markers for over 20 years and never had issues with them not coming out.  I also WASH all of my quilts as soon as they are quilted, so this gives me peace of mind that I know the marker doesn't have enough time to set in the fabric and become permanent.  And I quilt a top as soon as I mark it, I don't let it sit around for weeks or months.

Basting is also critical and I do pin-baste.  Every one has a variation on the technique, but my method is based on Harriet Hargrave's method in her book, Heirloom Machine Quilting.  I use an old folding table, clamp the backing fabric to it first, then lay the batting over it and then the top.  I am very careful to keep everything smooth and pin fairly close together.  When I finish basting, I check my backing for pleats or puckers.  Now is the time to correct them and repin if necessary!  Otherwise they will just get quilted in permanently later.

bloominginchintz.blogspot.com
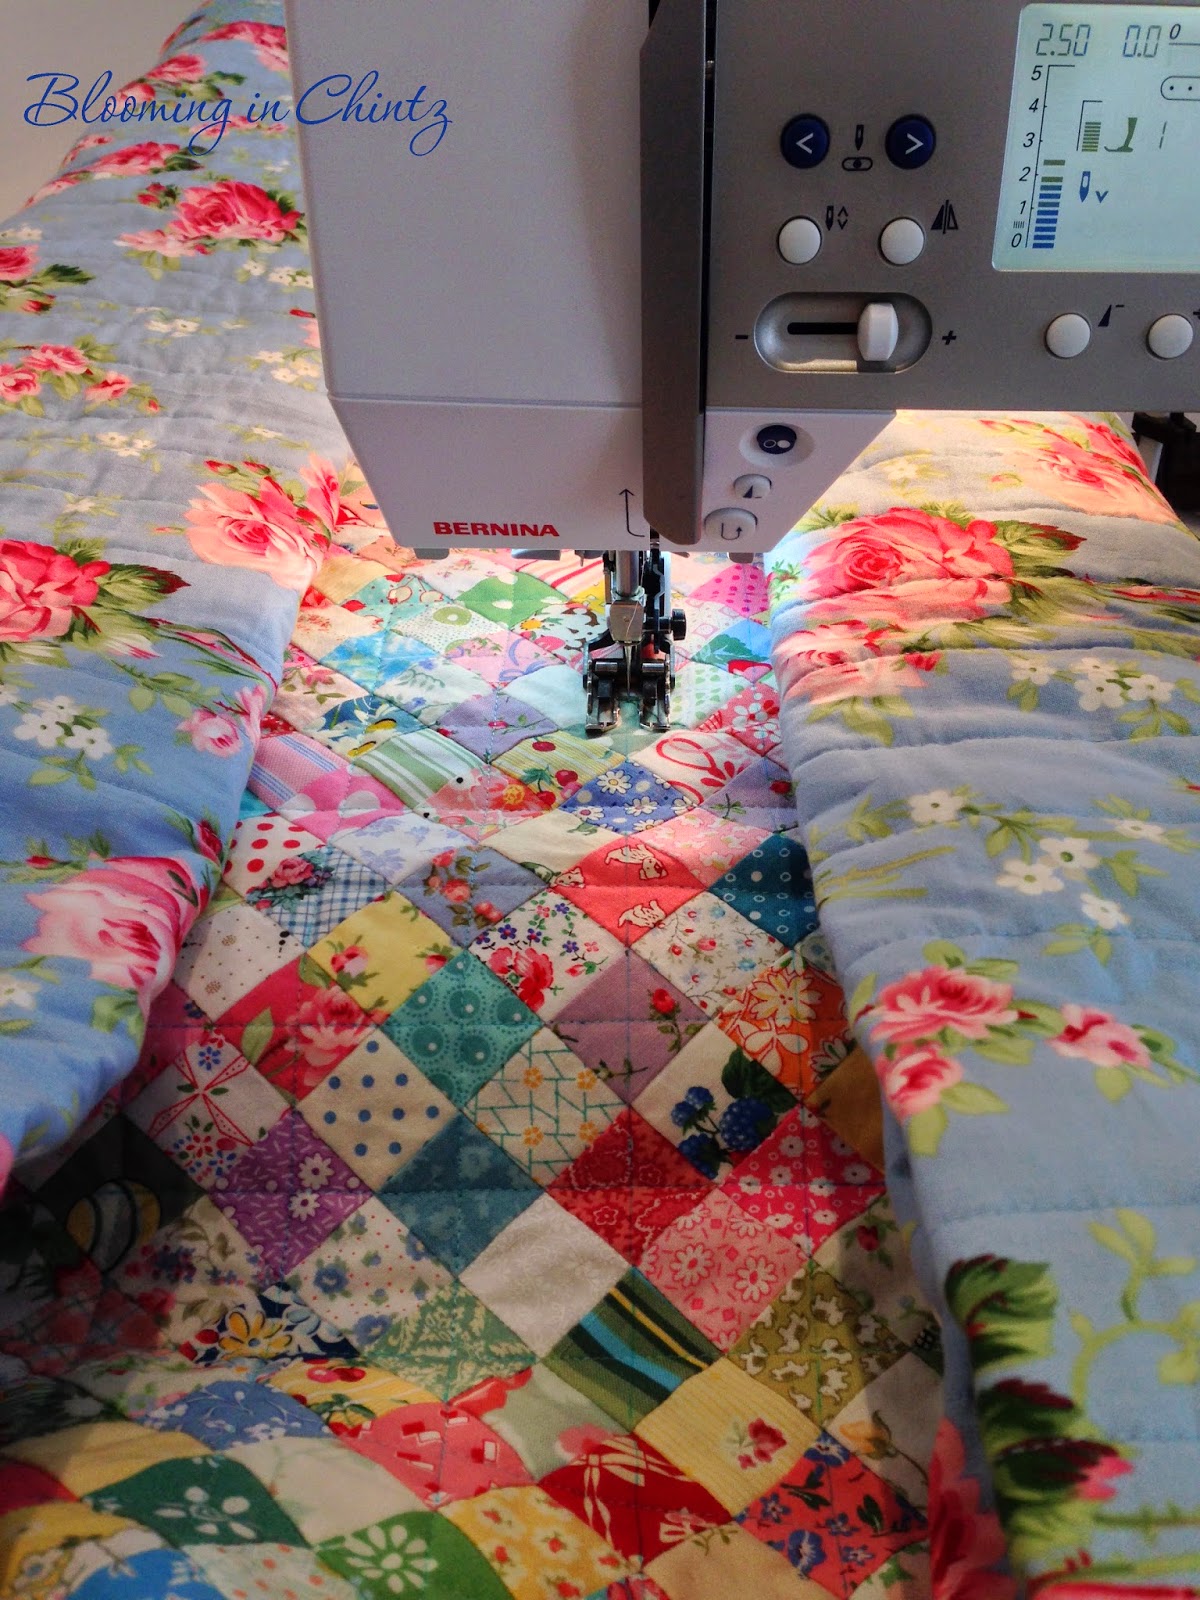
I mostly do some variation of grid quilting, channel quilting, or other combination of straight lines in the main body of the quilt.  The above pictures show how I package the quilt to feed it into the machine.  The walking foot does most of the work but I do support the front so that it doesn't drag on the needle.  This part is just a matter of sewing along the lines.  I remove the surrounding pins as I go and after each line is sewn.
bloominginchintz.blogspot.com
In this photo above, I am done quilting the lines in the center of the quilt and am ready to start on the borders.  This quilt has an inner border with a smaller, tighter cable, a pieced border with straight line channel quilting, and an outer border with a larger, gently curved cable.  I approach everything from the center, working out to the edge, or from left to right.  For a beginner, until you have done several quilts with cables, I would suggest only doing them on the outer most border at first until you get the hang of it.

Every brand of sewing machine is different, so talk to your dealer about what will work for you regarding a walking foot and a single hole throat plate.  It can be an investment, but if this is something that you think you will do, it's worth the money spent.
bloominginchintz.blogspot.com
I set my ironing board directly to the left of where I am sitting.  At this stage, the quilt isn't packaged like it was when I was sewing the straight lines.  The ironing board helps support the excess to the left and gives me a larger flat surface so the quilt doesn't hang down the front of my counter.
bloominginchintz.blogspot.com 
The cables on this quilt happen to wrap around the corners.  Sometimes I use cables that run off the edge of the quilt, it just depends.  But in this case, I want to start in a seamline so that my starts and stops are hidden.  Here I am pulling up the bobbin thread to the top of the quilt.
bloominginchintz.blogspot.com
Once I pull both the top and bobbin threads off to the side, I put the needle in the DOWN position right in that seamline.  The needle must stay in the down position throughout because this does require raising and lowering the presser foot.
bloominginchintz.blogspot.com
Since I needed two hands to photograph, I placed my Machingers quilting gloves on the quilt so you can get an idea of where I position my hands.  Please note that BEFORE I start sewing on this line, I removed the first safety pin!  I usually keep pins in until I am actually sewing in the immediate area.
bloominginchintz.blogspot.com
Here is another shot that shows an overall view of where my hands are in relation to the rest of the quilt.  Keep in mind, this is fairly slow sewing, very unlike free-motion.  I am using my hands almost like I would if I was free-motion quilting, palms flat, and guiding the quilt under the needle, following the line.  On a tighter cable such as this one in the innermost border, it required me to raise and lower the presser foot fairly often to get around the curves.  If you have ever machine-appliqued around circles or shapes, it's the same idea.  The larger cables allow for a little more speed, but for me, it's not about how fast I can quilt, it's about the finished look in the end.

The other thing that takes a little time is you will constantly have to arrange, rearrange, and adjust the position of the rest of the body of the quilt, especially when you are sewing a cable that wraps around the four borders.  You are sewing one cable line at a time, all the way around the four sides each time.
bloominginchintz.blogspot.com
Here I have ended the first line of quilting.  I left enough thread to triple knot both pairs, the beginning threads and the ending threads, and then threaded each pair onto a crewel needle, one pair at a time, and buried the threads in between the layers.  I bury the threads at the end of each line of stitching as I progress, it makes it much easier than doing them all at once when you are finished. 
bloominginchintz.blogspot.com
These pictures show how I am progressing to each line, one at a time, working from left to right.
bloominginchintz.blogspot.com

bloominginchintz.blogspot.com
And here I have completed all the quilting!  At this point I am so happy to be done, I can't wait to get it trimmed, squared, and in the wash next. 
bloominginchintz.blogspot.com
After trimming off the excess from the edges of the quilt, I run the edge of the entire quilt through a serger (overlock machine).  You could also do a zigzag or similar stitch.  YES, I do wash my quilt BEFORE I put the binding on.  And of course, I don't want the edges to ravel and fray in the wash.  Plus this gives me a nice flat edge for binding.  The main reason I wash it first before binding is that I want the quilt and batting to shrink and do all its puckering beforehand.  Afterwards, I put on the hanging sleeve, the binding and the label and because I've already washed the quilt, these will remain smooth and flat and do not pucker if I wash the quilt later.  This is critical for quilts that compete in shows.  Judges don't like to see puckered or bumpy bindings!
bloominginchintz.blogspot.com
And here are some shots of the finished quilt. . . 
bloominginchintz.blogspot.com

bloominginchintz.blogspot.com
Below are some pictures of cable stencils and photocopies of stencils I've altered to get a certain size and repeat to fit specific borders.  Depending on the border, sometimes I use a stencil and mark the quilt directly through it and other times I use a photocopy underneath the quilt top and trace it.
bloominginchintz.blogspot.com

bloominginchintz.blogspot.com

bloominginchintz.blogspot.com 
 And here are a few additional pictures of borders below.  The possibilities are endless!
bloominginchintz.blogspot.com

bloominginchintz.blogspot.com


bloominginchintz.blogspot.com

bloominginchintz.blogspot.com

Well, I hope that will inspire a few of you to try this yourselves.  Just remember, start with something small and simple to get the hang of it.  It's really easy and the effects are pretty impressive.  Feel free to ask me questions, I'm sure I've left out something!  Happy Quilting!!

2/3/2015 UPDATE:  PLEASE SEE MY POST ON HOW I MARK QUILTS FOR MORE INFO ON WATER SOLUBLE PENS AS WELL AS INFO ON STENCILS.  THANK YOU!

3/30/2017 UPDATE:  PLEASE SEE MY POST ON HOW TO FIT CABLES ON A BORDER FOR MORE INFO.