I thought I'd write a bit about how I mark my quilt tops since I am starting to mark my Ocean Waves quilt, which I finally finished over the weekend. This is the fifth king size quilt I've made, but the largest to date, finishing at 118" wide by 105" high.

Ever since my tutorial on quilting cables last year, it seems like I have had dozens of questions from readers asking me about the type of pens I use for marking, where I purchase them, and where I buy stencils from. So I am offering up some info. . . but. . . (disclaimer inserted here!) . . . understand that I am in no means the final word on what to use or how to mark your quilt! I am not paid by any company to test their product or promote their website, nor do I get anything sent to me for free for mentioning them on my blog. And I use what I like and what works best for me. You may not like the same thing and that is ok! This is where we are free to experiment and figure out what works best for each of us. You may read elsewhere that other quilters really dislike certain pens or products that I may use, and that is fine, everyone is entitled to their opinion.

These are the stencils I have chosen to use on my Ocean Waves quilt. I usually order stencils online from The Stencil Company at www.quiltingstencils.com. They have a great selection and an easy site to navigate and you can search by type of stencil or by size. They will also make a stencil for you if you submit your own artwork. Please contact them for more information. Another good source is Quilting Creations International at www.quiltingcreations.com. They also have a wonderful variety to choose from. If you do a web search for "quilting stencils" I am sure you will come up with others.
 For those of you who have asked, here is a photo of the marking pens I use the most. Most of the time I buy the blue water soluble pens at Joann's or Michael's with my coupons. The Sewline Styla and Clover pen were purchased at a quilt shop. The water soluble pencils are from my art supplies, so any good art supply store should carry them.
I really like the water soluble pens in blue (and in white for dark fabrics). I like the immediacy of the pens, the fact I can barely touch the tip of the pen to the fabric and it leaves a line, and they show up on almost all fabrics and colors. I like the fact that they wash out and I have never, ever, in over 20+ years of using these pens, have had the marks return after time. And I wash all of my quilts after I quilt them, show quilts included. You'll see a couple of water soluble pencils in there and I only use these when I have a really dark or busy fabric where the pens just aren't making a mark dark enough or bright enough for me to see.
I write the date on the bottom of each pen when I take it out of it's package so I can keep track of old ones versus newer ones. I probably get a least a year or so out of a pen. I store them in a Ziploc bag when not in use, laying flat, in a drawer (out of light). I use several pens at one time when marking a quilt and rotate between them so I'm not wearing just one out completely.
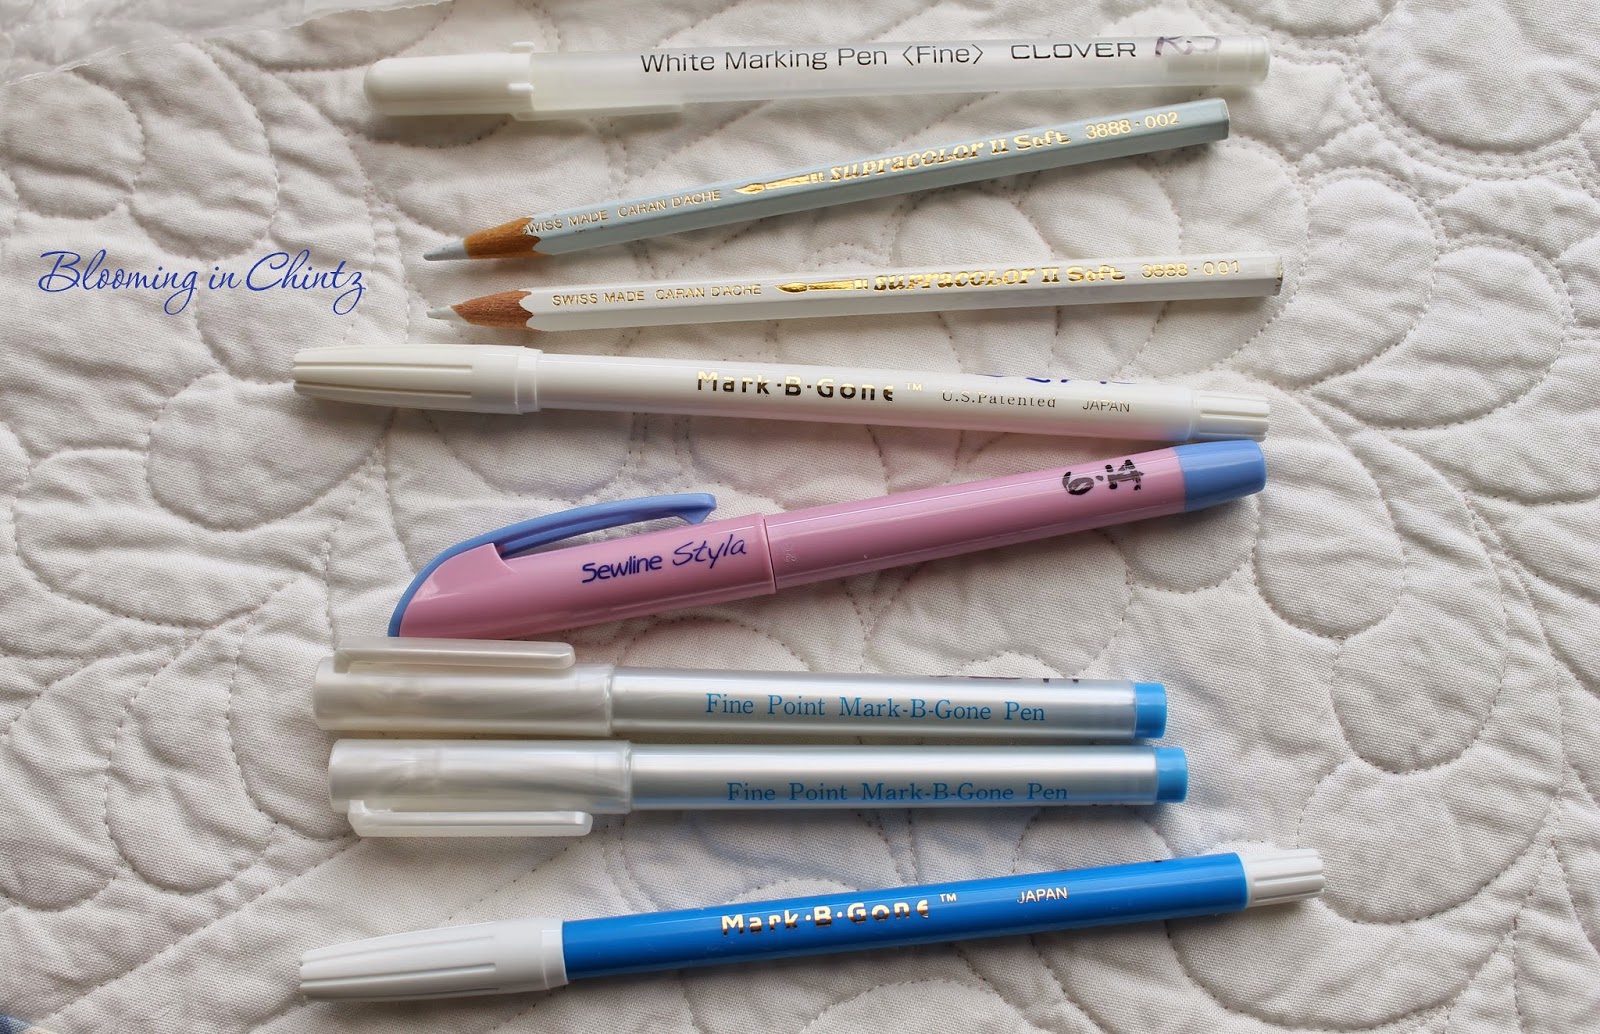
I really like the water soluble pens in blue (and in white for dark fabrics). I like the immediacy of the pens, the fact I can barely touch the tip of the pen to the fabric and it leaves a line, and they show up on almost all fabrics and colors. I like the fact that they wash out and I have never, ever, in over 20+ years of using these pens, have had the marks return after time. And I wash all of my quilts after I quilt them, show quilts included. You'll see a couple of water soluble pencils in there and I only use these when I have a really dark or busy fabric where the pens just aren't making a mark dark enough or bright enough for me to see.
I write the date on the bottom of each pen when I take it out of it's package so I can keep track of old ones versus newer ones. I probably get a least a year or so out of a pen. I store them in a Ziploc bag when not in use, laying flat, in a drawer (out of light). I use several pens at one time when marking a quilt and rotate between them so I'm not wearing just one out completely.

The down side of using the pens with stencils is the tips wear out rapidly from the abrasion of the stencil plastic against the felt tip. It also can be a bit time consuming tracing every single line, especially if you have a detailed stencil and/or a very large quilt to mark. So for this quilt, I thought I would try a couple of new marking tools to see if it would save some time.
I wanted to do a little sample test to try out a couple of them and make sure they wash out of the fabric I used on the Ocean Waves quilt. I also wanted to get comfortable quilting the designs before I tackle them on such a large quilt. All my fabric is prewashed, lightly starched and pressed, so I did the same thing on the sample to achieve the same effects.

I tried the Barely Blue Quilt Pounce by Hancy in combination with the stencils. It is a light blue wash out chalk that you fill into the pounce holder. It is a very fine, soft silky chalk and reminds me of baking powder or baby powder. You don't pounce it or bang it onto the stencil, you rub it or wipe it across the stencil. I found it worked well when I rubbed in a circular motion and the best part was it was super fast and easy to do. Taping the stencil down is also a good idea to keep it from shifting. The blue chalk does NOT iron off like the white chalk does, it is only a wash out chalk. It also comes in pink. I ordered it through www.connectingthreads.com when I was purchasing Hobbs batting during their sale last week, but you can find it in quilt shops, at Joann's, and on other websites.
Here is a video by Leah Day that shows how to use the pounce pad: https://www.youtube.com/watch?v=UZvWVNJHHqs
Because I will be handling a large quilt and folding it, rolling it up on itself, etc., I don't want the chalk to brush off. So I sprayed the chalk markings with Niagra spray starch and let it air dry. This acts as a temporaray fixative and keeps the chalk from rubbing off until the quilt is washed. One important note here: if you plan on using any water soluble marking tool on your quilt along with the chalk, do so AFTER you have sprayed the starch over the chalk lines! Do all of the chalk lines FIRST! The spray starch will remove any water soluble lines due to the fact that it is a wet spray!
Roxanne's chalk pencils are the other marking tool I experimented with. The package came with two silver and two white and I also ordered these from Connecting Threads. I used the silver pencil to try with the stencils. I used it with a heavy hand, making fairly dark marks to really put it to the wash out test. It grabbed the fabric well and made a visible line that was easy to see. It looked more like a graphite line than chalk to me, however.
Free-motion quilting on the blue chalk lines was a breeze. I could see the line clearly, it remained bright and distinct, and for backtracking, it was very easy to see my previous stitches and needle holes. I did not like the gray lines from the Roxanne pencil on the free-motion area for the feathered wreath. I couldn't tell where my previous stitches were or see the needle holes for backtracking at all, it all blended together, making it difficult to see. That could also be partly due to the fact that I did make these lines fairly dark. However, for the straight lines, the silver pencil worked perfectly fine. They were easy to see and when I was just sewing forward or backward and not backtracking, it was satisfactory.

Here is the finished test sample after it has been washed. The top thread is Wonderfil Invisafil 100 weight in white, an extremely soft and very fine polyester that is absolutely wonderful to sew with and just sinks into the fabric. The batting is Hobb's Heirloom 80/20. It was washed in warm water on a gentle cycle with liquid Tide. After the first washing, 100% of the blue chalk lines were gone. I am completely happy with the blue chalk pounce pad and will be using it from now on with stencils! The silver lines from the Roxanne marking pencil were about 90% gone. There was still a light gray shadow that remained, however, and considering they claim this is "chalk," I was a bit skeptical. So I spritzed it with OxiClean spray stain remover and washed it a second time, exactly as I had the first time (I did not let it dry between washings). Upon removal, I was happy to see that ALL markings were 100% gone.
In conclusion, I will be using the blue chalk pounce pad along with the blue water soluble marking pens on my quilts. If I choose to use the silver Roxanne pencil, it will be with a much lighter hand and only on straight lines.
The pictures below show how I am marking the actual quilt. I work on a section at a time on the counter in my studio. I marked the feathered wreaths in the white squares first with the stencils and blue pounce pad. Then I sprayed those with starch. And after everything was completely dry, I marked my straight lines with my water soluble pens. Then I move onto the next section of the quilt and do the same thing. I will mark my borders last. I will cover up any areas of the center part of the quilt that have water soluble pen with large sheets of paper before spraying the borders with starch. I definitely do not want to erase hours of work!


I hope that answers some of your questions! If I have left something out, please don't hesitate to e-mail me or leave a comment. Happy Quilting!


